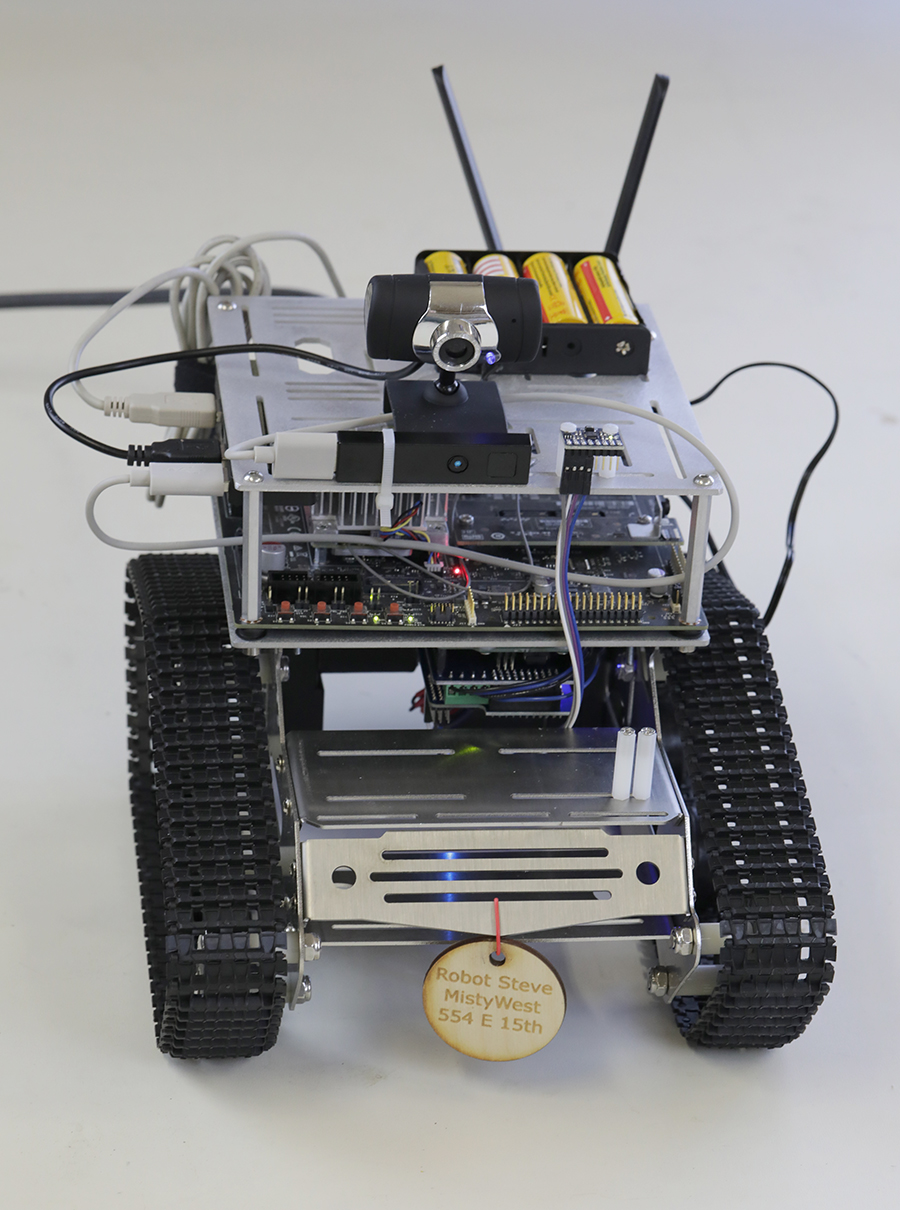
A New Robot Body For Steve
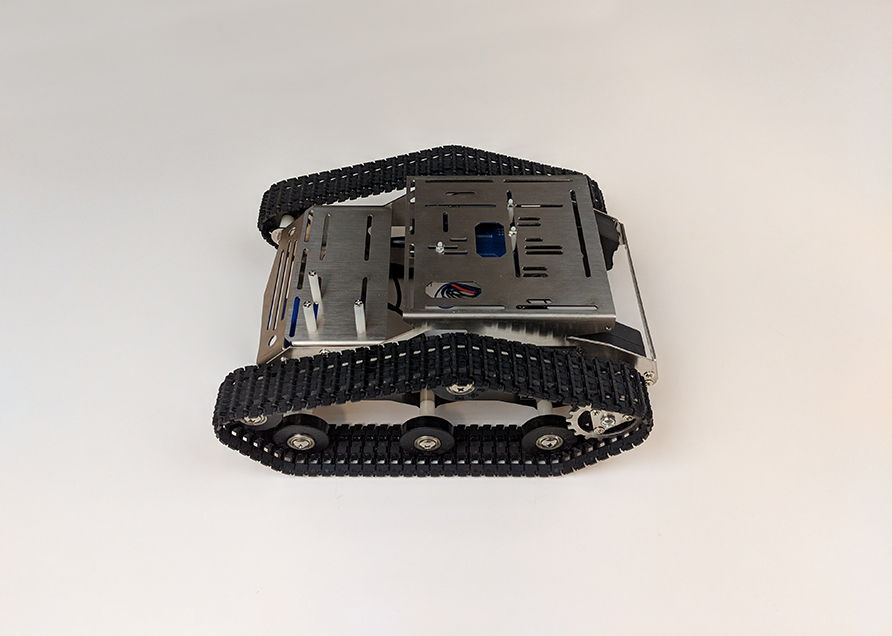
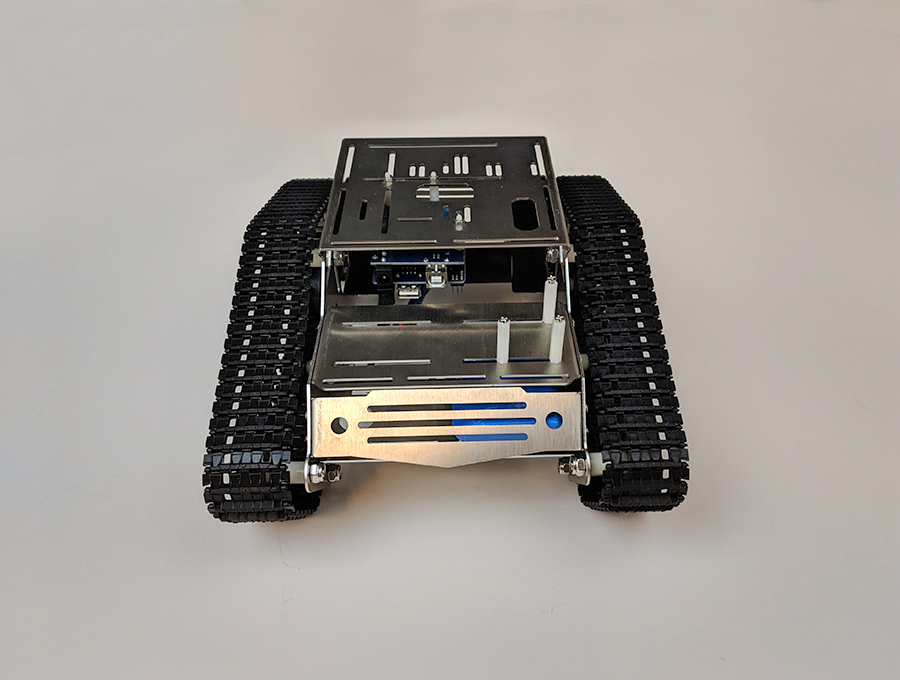
The Kuman SM5-1 Chassis
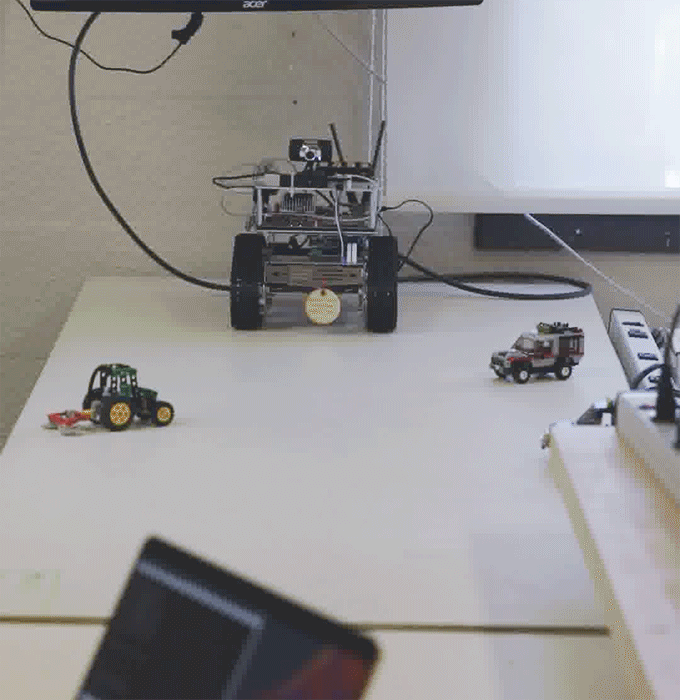
After a long journey of trying different RC car chassises, we found that they were not able to carry the weight of our compute and sensor suite platform. In the end, we purchased the Kuman SM5-1 track robot platform; a basic track chassis, but large and sturdy enough to for our needs. It also comes with an Arduino compatible control board, a motor driver shield, a USB camera on a servo swivel mount, and an externally powered servo shield.
We followed the build instructions very closely, but made two significant changes:
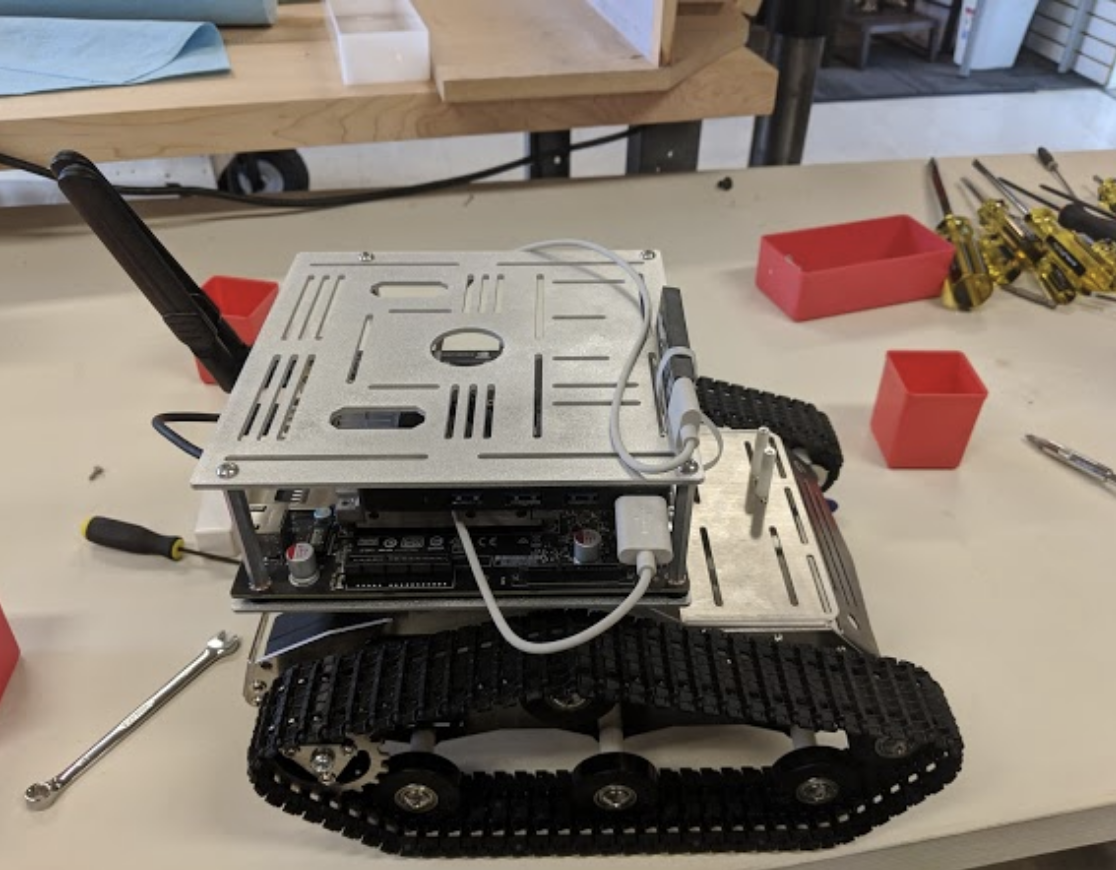
- We mounted the Arduino and the additional driver boards underneath the chassis.
- We changed the Arduino-compatible board to a genuine Arduino Uno. We found that the serial port of the clone did not connect to the TX2; this could theoretically be solved by compiling the correct kernel module on the TX2, but as we had a genuine Arduino lying around in the lab, it was quicker to just change the boards.
Body Customizations
After setting up the Kuman SM5-1, we found that we still didn’t have enough space for all our components. To solve this, we enlisted our co-op student Celinna Wu to design two additional mounting plates to house the TX2, a USB hub in the mezzanine layer and provide a very flexible mounting interface at the top.
In addition, we replaced the plastic servo motors with metal gear versions of the same form factor.
In total, we added the following components:
- NVIDIA TX2 development board with compute module
- Battery power for the TX2
- PICO FLEXX Depth Camera
- Inertial Measurement Unit (GY521)
Things on the waiting list:
- Robot Arm
- Camera Arm
- Other sensors from the Arduino Sensor Kit
The Sensor Package: Cameras, Depth Sensors & IMU
TX2 MIPI Camera
The TX2 development board features a CSI camera attached directly to the MIPI connector. Unfortunately, this camera did not immediately register as a Video for a Linux device. We found an excellent blog post by Peter Moran and several helpful comments on the Nvidia blog that helped us overcome this challenge.
The camera registered as /dev/video0 and we eventually settled on a gstreamer based image capture:
Insert code This pipeline can be used later in the ROS gstreamer node.
USB Camera
Since the Kuman SM5-1 came packaged with a USB RGB camera, we figured we might as well incorporate it into our system. The camera registered as /dev/video1 and can be accessed as a standard V4L device.
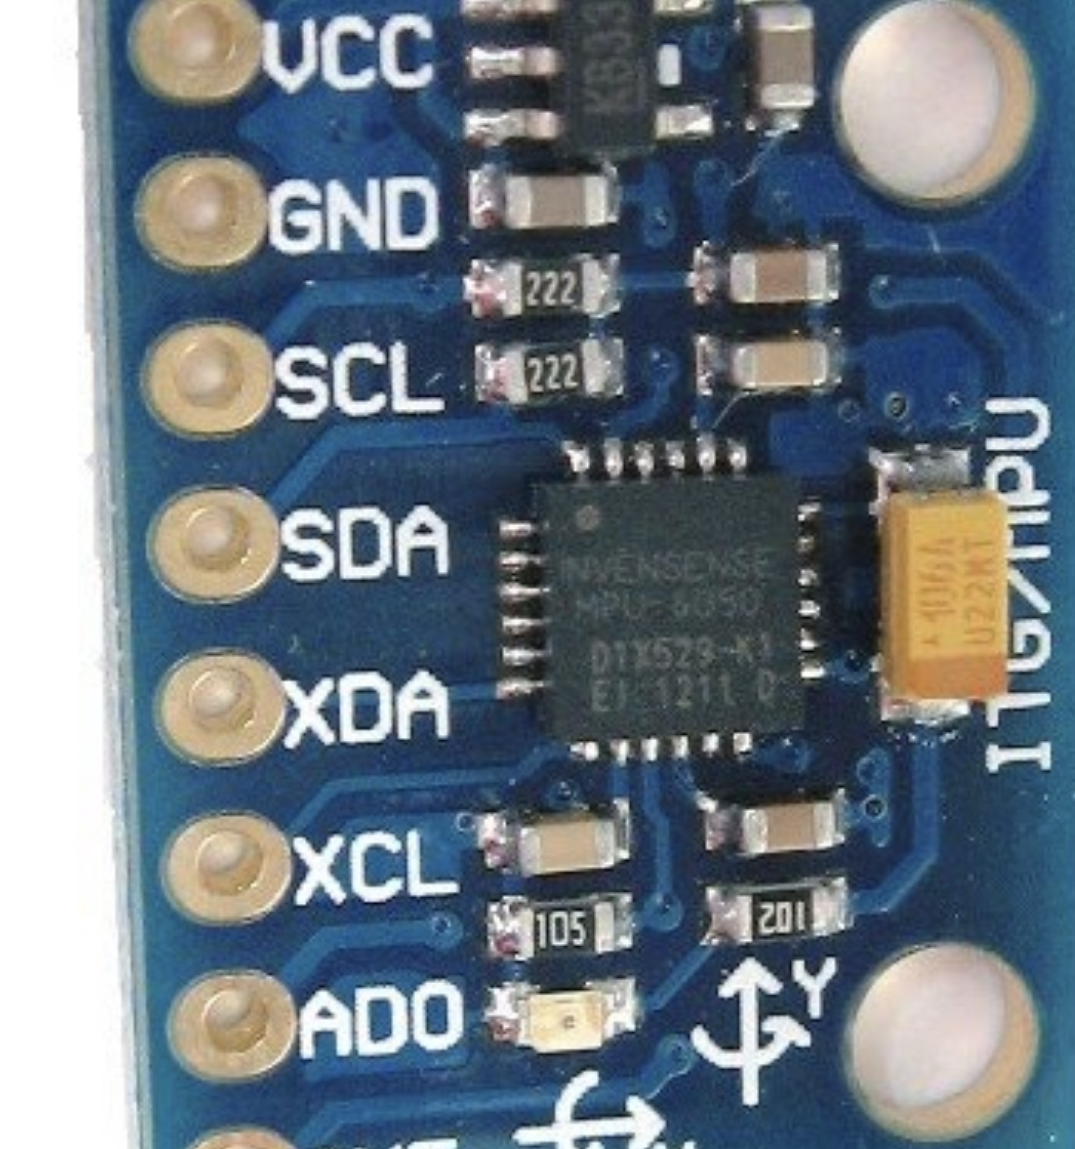
IMU – Inertial Measurement Unit
By sheer luck, we had an unclaimed sensor box for Arduino (37 sensors by Elegoo) lying around, and amongst other interesting things it contained the GY521 inertial measurement unit. We connected this unit to the Arduino and updated the sketch to allow for the motor driver and IMU code to coexist.
Time of Flight 3D Camera
MistyWest is testing depth cameras at the moment, and luckily we had a spare (i.e. unclaimed) CamBoard pico flexx time of flight sensor. This sensor features an attractively small form factor, easy connection via USB 2.0 or 3.0 and Thiemo Wiedemeyer wrote an excellent ROS integration node hosted on GitHub. Getting the camera to work on the TX2 is a simple three liner:
$ roscore

$ roslaunch pico_flexx_driver pico_flexx_driver.launch publish_tf:=true

$ rosrun rviz rviz
Even better, ROS integration already exists through the ps4-ros package. All we need to do is to modify the launch script and we were good to go:
$ roslaunch kuman-sm5 ps4.launchDesired Capability
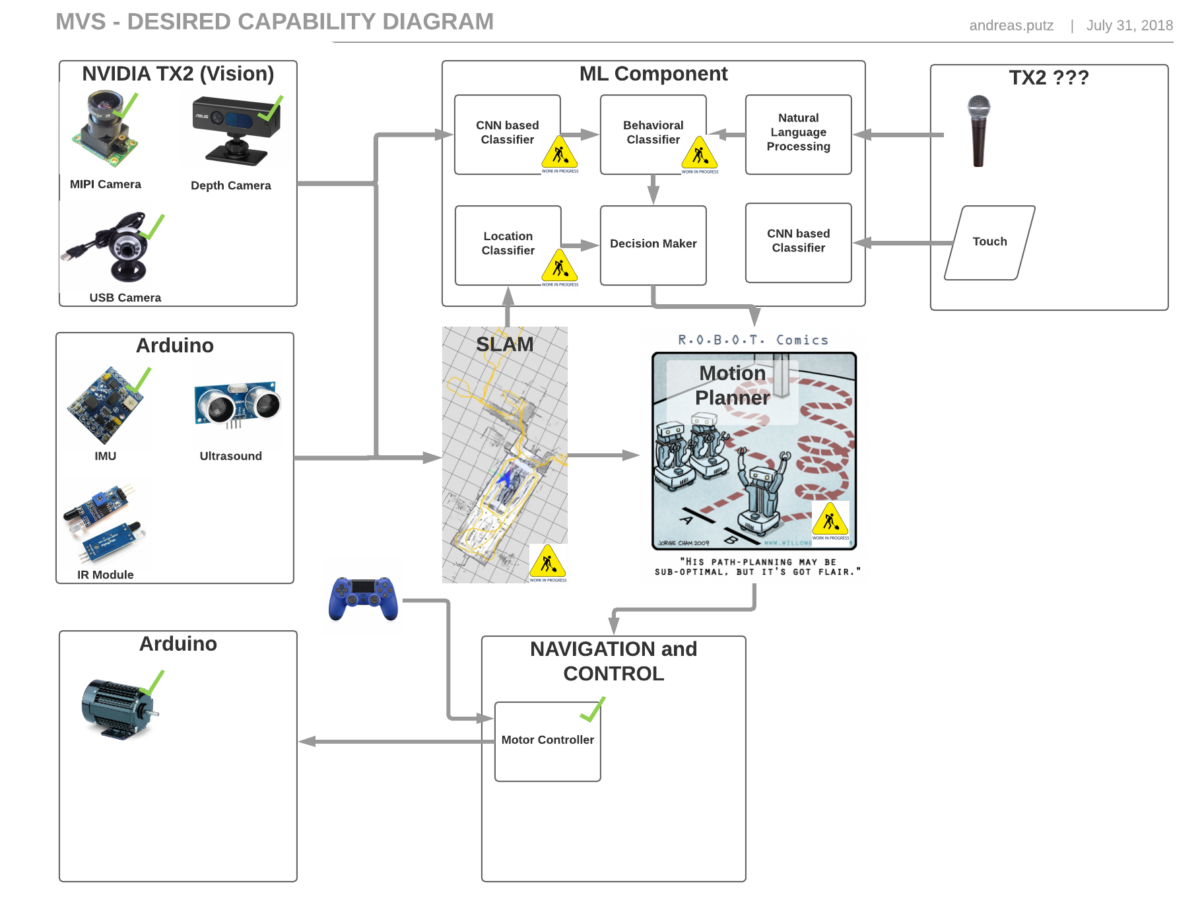
At a very high level, we would like Steve to execute a hierarchy of tasks:
- Create a map of the environment and locate yourself in it, or in technical terms: Simultaneous Location and Mapping (SLAM)
- Move autonomously within the environment
- Plan actions based on sensory input:
- Emulate dog-like emotions based on camera and audio inputs
- Plan motion according to emotional stage:
- exploration
- planned motion from A to B
- execute other actions (bark, actuators …)
- Learn from the environment
- Recognize changes in the environment
- Detect objects within the environment
- Detect people
- Start to recognize specific people
- Detect emotions in people
Robot Operating System

Source: http://www.ros.org/about-ros/
About ROS
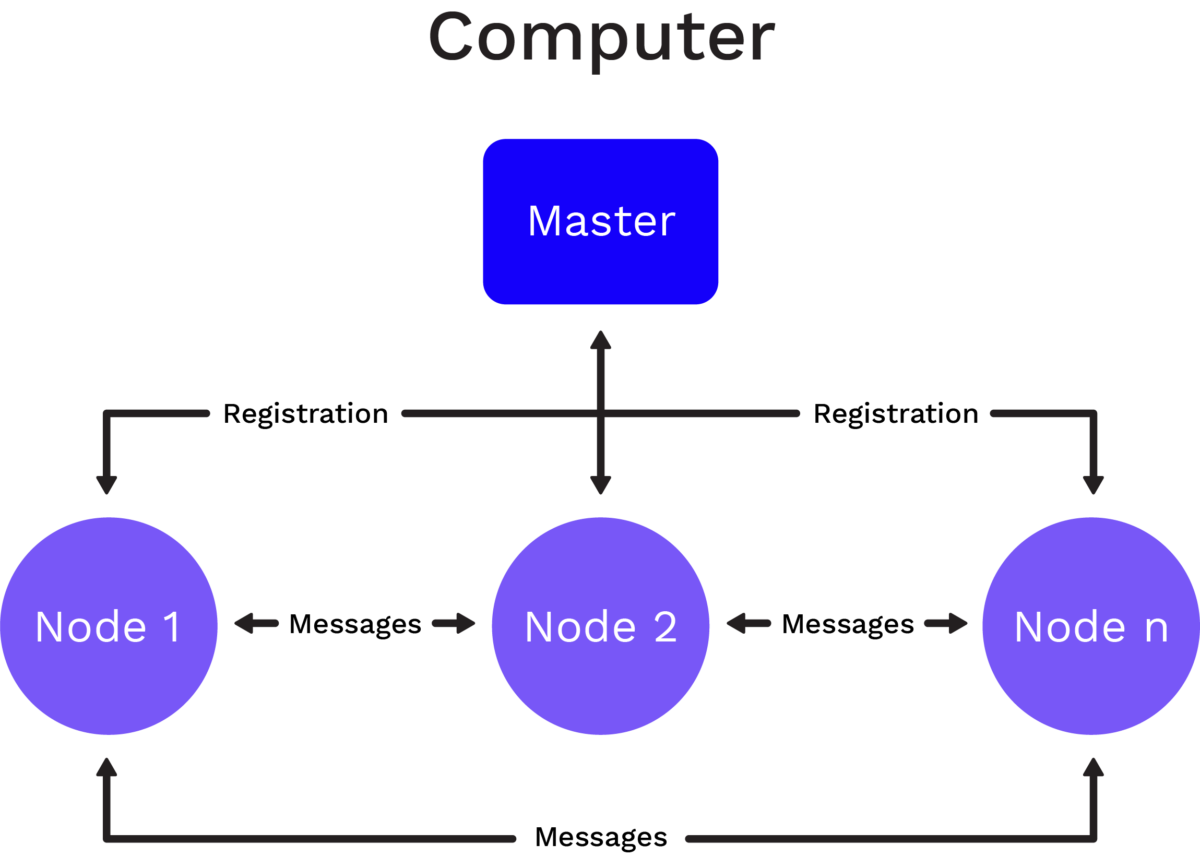
The Robot Operating System (ROS) provides a unified framework to write software for robotics. It is specifically designed to optimize code reuse and sharing.
Simplified, the framework provides:
- Nodes: A node encapsulates a specific functionality (e.g. motor controls, image acquisition, SLAM, steering)
- Topics: Anonymous and asynchronous publish/subscribe system for messages and data
- Much more (http://www.ros.org/core-components/)
ROS for Robo Steve
Source Code
We have created a Bitbucket repository, which contains documentation, source code and third party repositories.
It’s intended to be compatible with the ROS build system catkin.
$ git clone [email protected]:mw_active/steve-ros.git

$ cd steve-ros
$ git subodule init
$ git submodule update
The final project structure should resemble the above snapshot.
Then follow the steps in the README.md file and the documentation hosted on ReadTheDocs.
.
├── bin
├── catkin_ws
│   └── src
│       ├── kuman
│       │   └── kuman_sm5
│       └── third-party
│           ├── loam_velodyne
│           ├── mpu6050_serial_to_imu
│           ├── pico_flexx_driver
│           ├── ps4-ros
│           └── serial
└── doc
   ├── doxygen
   └── sphinx
       └── api
Run RoboSteve, Run!
After source code checkout, installation of the prerequisites, and successful compilation, it’s time to try out RoboSteve. For the demo, a tether to a monito via the HDMI connection, mouse and keyboard are necessary. A VNC connection would also work, but viewing the 3D point could be tricky.
The source code provides a few convenience launch scripts:
roslaunch kuman_sm5 kuman_SM_startup– launches the cameras, motor controllers and IMUrosrun teleop_twist_keyboard teleop_twist_keyboard.py– starts a basic keyboard controllerrosrun kuman_sm5 ps4.launch– Allows control of the robot through a PS4 controllerrosrun rviz rviz– Starts the RVIZ visualizer
After launching the nodes, the compute graph generated by rqt_graph should look like the following:

Compute Graph of RoboSteve ROS nodes in operation. Red denotes camera nodes, blue the 3D acquisition systems, orange control for motors and servos and yellow other sensors like the IMU.
Next Steps
So, we finally have a basic mobile robotics platform. We can remotely control the robot, we get sensor feedback, and rqt shows a nice 3D point cloud of our environment.
However, we are far from done. Some potential next steps are:
- Combine IMU/3D image data and feed into a SLAM algorithm
- Make the previously implemented image classifier and emotion algorithm ROS compatible
- Path planning
- More sensors and actuators
- Cloud connectivity
- A swarm of Steves