
BLOG
Dyson Airwrap II: Technical Teardown
Editor’s note: this teardown was conducted in 2019. Please don’t send us a message asking how we can help you with taking apart or reassembling your AirWrap, because sadly Phil no longer works at MistyWest.
Last week, we brought you the first part of our Dyson Airwrap series where we looked at the surface of this achievement in product development, and then used it to deliver a bomb makeover for Ryan Walker.

Ryan Walker gets Lana Del Rey inspired waves thanks to the Dyson Airwrap
By now you’re probably familiar with what the Dyson Airwrap is, but in case you’re just joining us: the Dyson Airwrap is a high end hair styler that uses the Coanda effect–a phenomenon whereby a jet of air will attach itself to a surface because of a pressure differential between the surface of an object and ambient pressure–to straighten, curl, and style hair as it dries it. The clever usage of this technology allows the Airwrap to pull and curl hair along its attachments effortlessly.
We’ve proven that the device does (somewhat) deliver what it promises for curly hair. But is it built to last? For a whopping $784 CAD, we had high expectations for the design of this styling tool – and boy, did it deliver. We’ve summarized the teardown of the Airwrap below and in a video for your enjoyment.

The Dyson Airwrap and its various head attachments
Beneath the filter is another housing with a metal mesh, which is retained with some snap fit. It’s quite a complex part, having multiple mold pull directions, a snap fit housing for a programming/test connector, and over molded metal meshes.
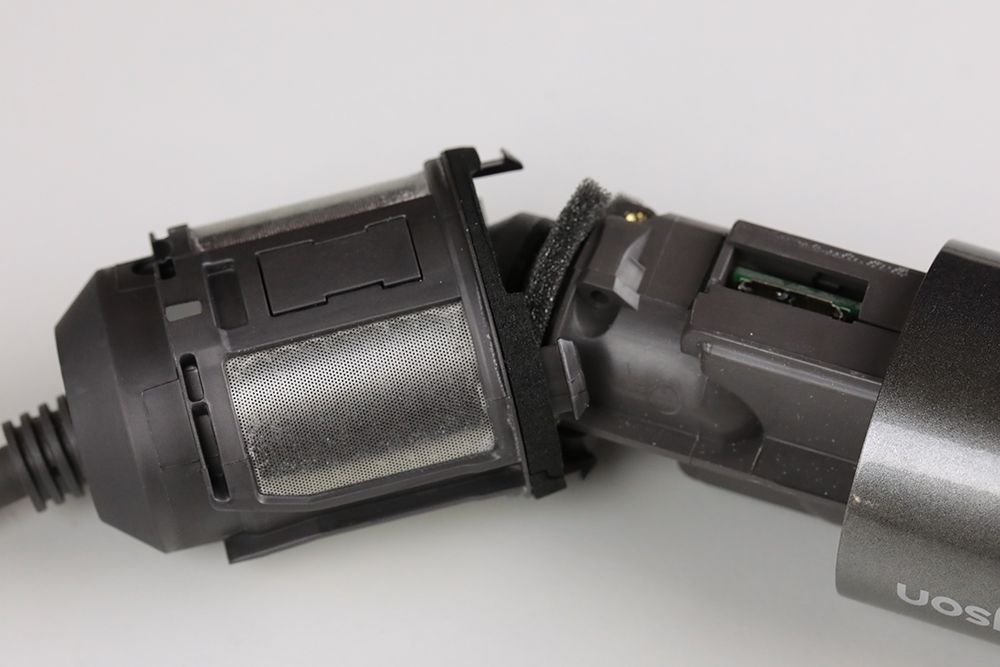
Upon first inspection, it appeared there was a power supply or transformer included in the power cord – but after getting a second opinion from my colleague, he identified that it is an AC line filter that is most likely used to suppress EMI (electromagnetic interference) for certifications.
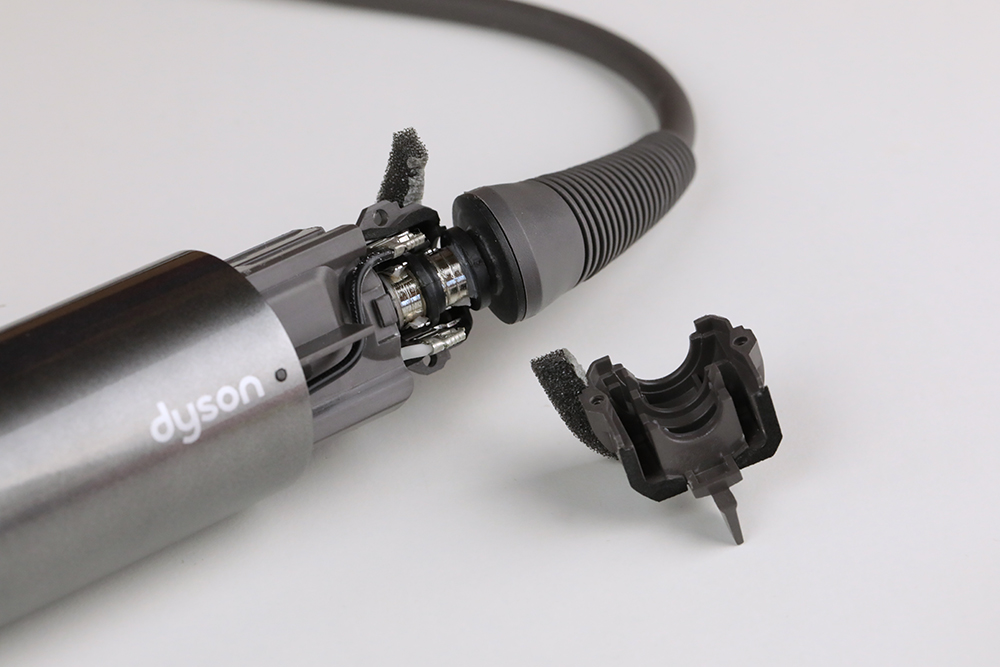
To prevent tangled wires, Dyson opted to design a compact, custom slip ring for the power cord to rotate freely without catching or damaging wires. This is a challenging design engineering feat to get right, typically requiring custom contacts, lifetime testing, and conductive lubrication.
So, we are starting to see very clearly where the Airwrap gets its price tag.
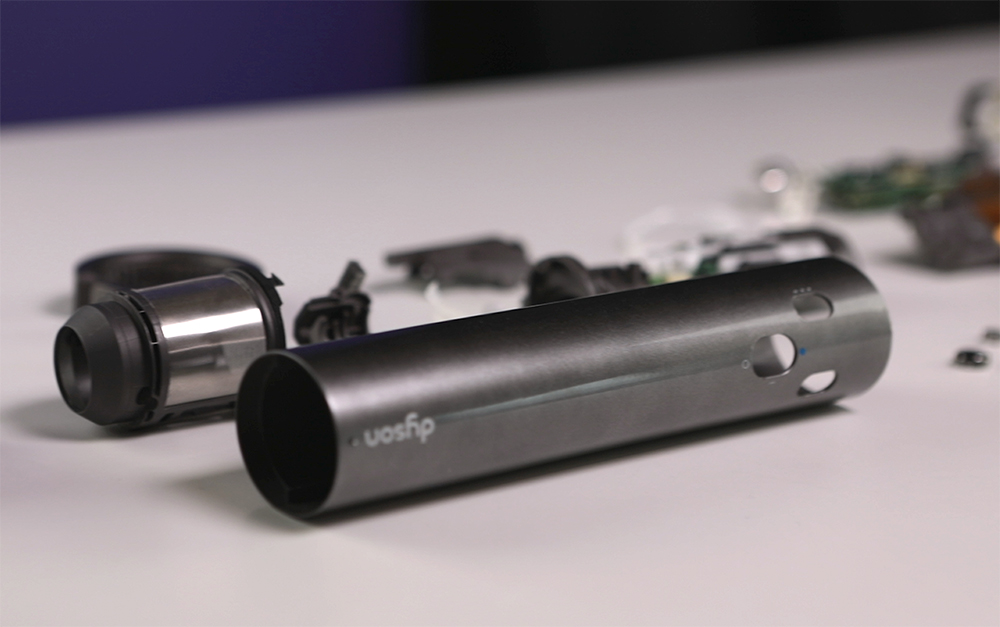
A body made of steel … looking plastic
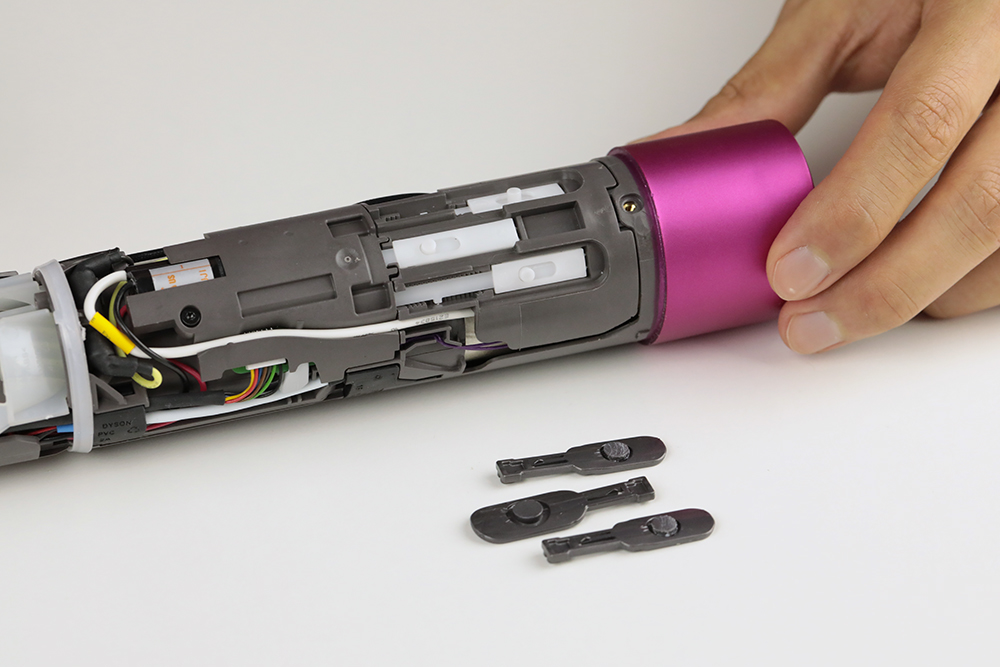
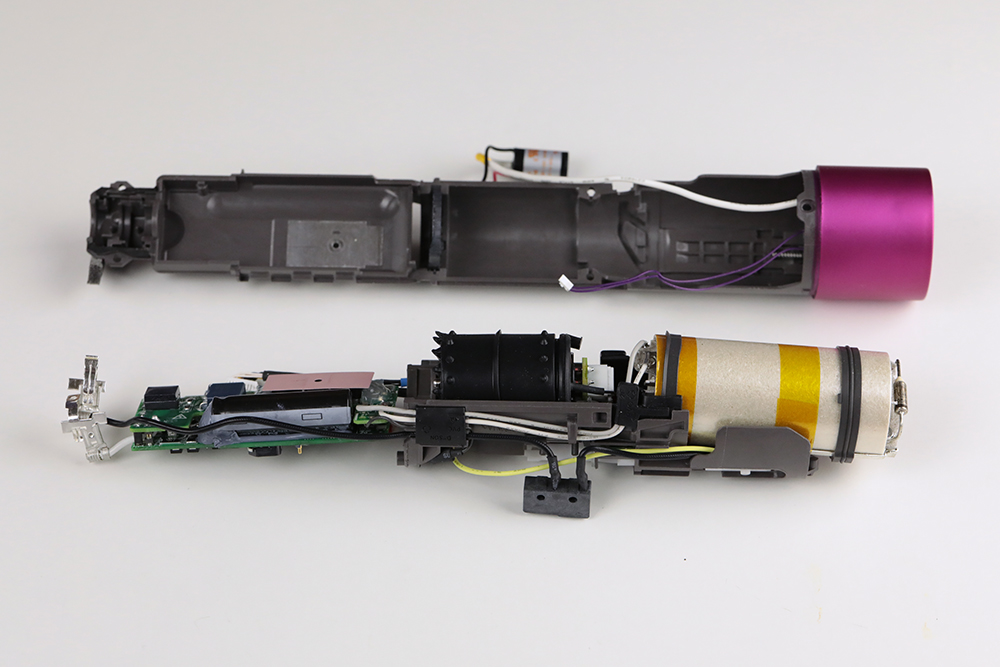
After removing several screws and the glued buttons, the entire main body slides out of the cylindrical housing. The amount of thought and design that went into making this sub-assembly so compact and neatly wired is truly tremendous.
The Airwrap has a spring loaded latch at the back that is used for locking in its styling attachments, and some pretty cool buttons with molded ratcheting teeth that provide a nice tactile feel. Overall, the body’s design has lots of snap fit components and minimal screws, which saves significant time in assembly and parts count.
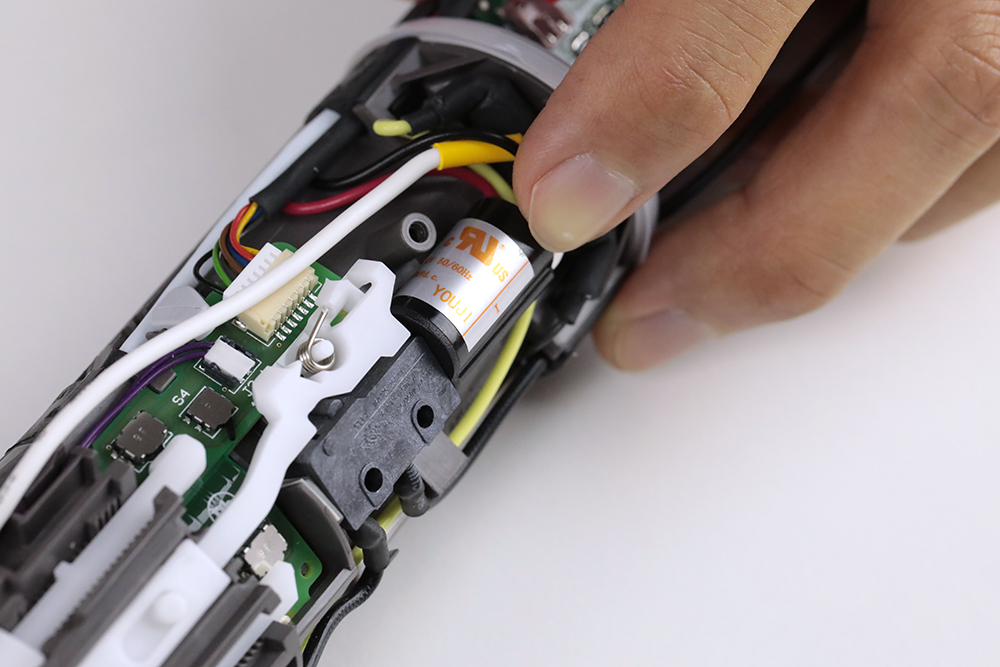
Removing two covers exposes the electronics; two main boards stacked on top of each other, and a rigid-flex board for the switch assembly. Inside, we find a little negative ion generator, presumably included to prevent static buildup and frizzy hair (always thinking, those Dyson engineers!), and the main board has a spring pin which contacts shielding for grounding and EMI.
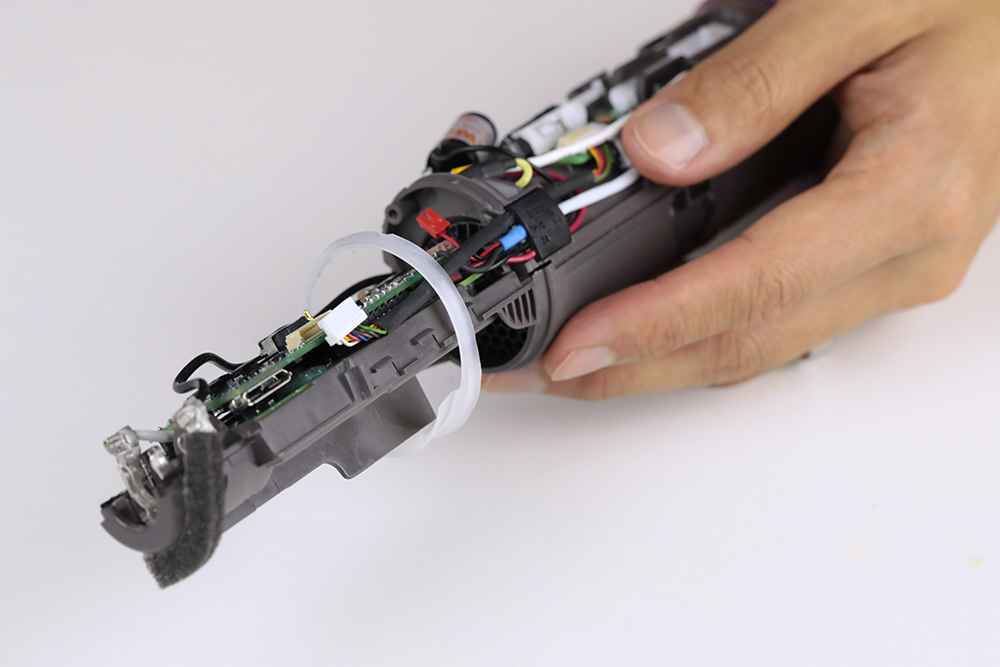
Removing a custom clip–which not only holds the two plastic bodies together, but also holds all of the cabling together (a 2-in-1 functional part!)–allows us to break open the remaining housing and get clearer view of the PCA (Printed Circuit Assembly), heating coil, and the Dyson Digital Motor.
The heater is a pretty straightforward resistive heater that runs off AC voltage, and is encapsulated in a fibre glass housing with a thermistor for temperature measurement. The motor is covered in a custom silicone boot, likely intended to dampen vibrations and reduce noise, to make using the Airwrap a tolerable (and not deafening) experience.

Check out that custom silicone boot
The last part of the main housing holds the metal exhaust grill, what appears to be the negative ion electrode and a secondary thermistor for redundancy.
Diving deeper into the electronics
The Dyson Airwrap has three PCAs in total; two stacked on top of each other as the main control board, and one rigid-flex for the switch assembly.
The main board has a microcontroller, DC power components, three large package MOSFETS–two of which are likely for motor control in a half bridge configuration, and the other for the power circuitry–and a full bridge rectifier. The rigid-flex switch is just a collection of toggle switches, but Dyson needed the flex portion in order to wrap around this cylindrical design.

The Dyson Airwrap’s rigid flex assembly
The backside has two large switch devices, possibly TRIACs (Triode for Alternating Currents) for switching the heater–which runs off AC voltage–on-and-off, and there’s a really interesting overmolded piece of aluminum in the back housing that is thermally connected to the TRIACs by use of a thermal pad.

So it is worth the money?
I’ll be honest that I was expecting the need to Dremel some parts, but it was surprising to see how well designed the parts were; not just for assembly but also for disassembly, making it rather user friendly. While at times I did feel that some components of the Airwrap were overly complex or possibly unnecessary, Dyson clearly values speed and usability.
The Dyson Airwrap is an amazing example of great engineering work and design for manufacturing. The decisions made for its design stand out, and upon examining its internals it’s clear why this device retails for nearly $800 CAD. The inclusion of a custom slip ring, magnetic latches for usability, and small touches like wire management and dampening of vibrations/sound really show that this device is built to last.
If you have considered purchasing a Dyson Airwrap but are deterred by its expensive price (and plastic body), you can rest (somewhat) assured that it very well could be the last styling tool you’ll ever purchase.
With that, we leave you with our video of this teardown (featuring appearances by Milou Tsao). We hope you’ve enjoyed this series, and we look forward to bringing you more fun content in the near future.